What’s a Homelab?#
A Homelab is an at home space where you can do experiments without major consequences. In my case, it’s an opportunity to play with various technologies that interest me, mostly infrastructure-related ones. So, this means I can enhance my skills and learn new stuff that will be useful for my career. Above all else, it’s a great way to have fun with hardware and software. Working as an SRE, my Homelab consists mostly of deploying, observing and automating different kinds of cloud-native applications on my servers.
Why build a Homelab at all?#
For starters, there are many reasons why having a Homelab is great. The main reason that comes to mind is to be fully independent when it comes to self-hosting stuff. That means never paying for a server provider, for instance, when working on side projects. For me, this means deploying various kinds of applications on my Homelab, including Nextcloud, Pi-hole or this very website, to name a few examples. Another reason is to experiment more with bare-metal technologies.
Working in SRE, I mostly interact with major cloud vendors such as Google Cloud or AWS. However, it’s an entirely different story when it comes to physical servers, where everythings needs to be managed. With Kubernetes, it also means managing the control plane, unlike in AWS, for instance, where it is managed by them. It also forces you to learn more about networking, since you’ll be assigning IPs on your own network, which is a fun challenge to say the least.
Another fun aspect is working with hardware, something you certainly never have to do on the Cloud, except maybe when choosing machine specs. For me, building this server rack was my first experience with server hardware. Having already built many PCs before, it wasn’t that complicated to build.
What kind of equipment am I using?#
Initial Specs – March 2021#
When I started this project in March 2021, I wanted a very small lab to perform experiments with Kubernetes. So, here are my initial specs:
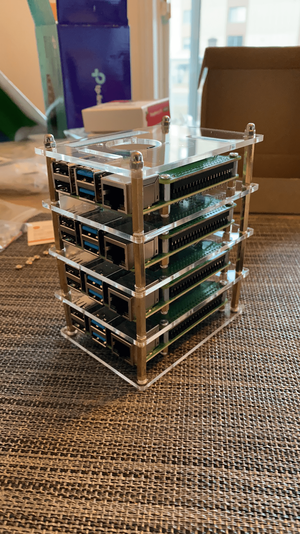
- x4 Raspberry Pi 4b
- x4 64GB micro SD cards
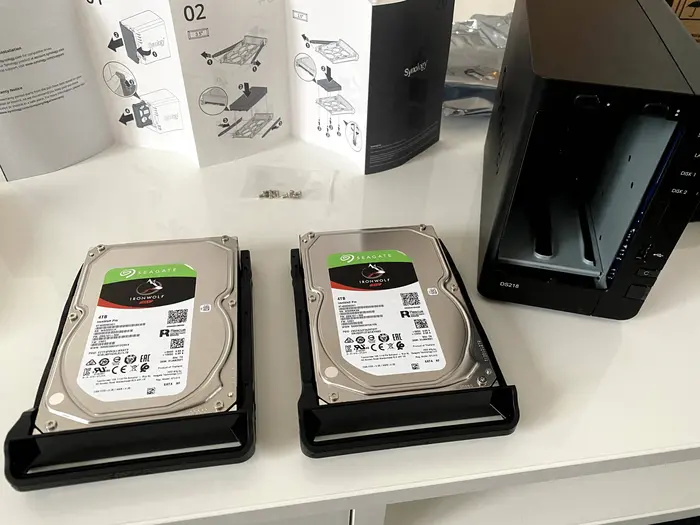
- x2 4TB Iron Wolf Pro HDDs
- x1 Synology DS218 NAS
- x1 5-Port TP-Link PoE Switch
Here’s what the cluster looked like fully assembled:
The NAS with HDDs inside of it (which is used as an NFS server):
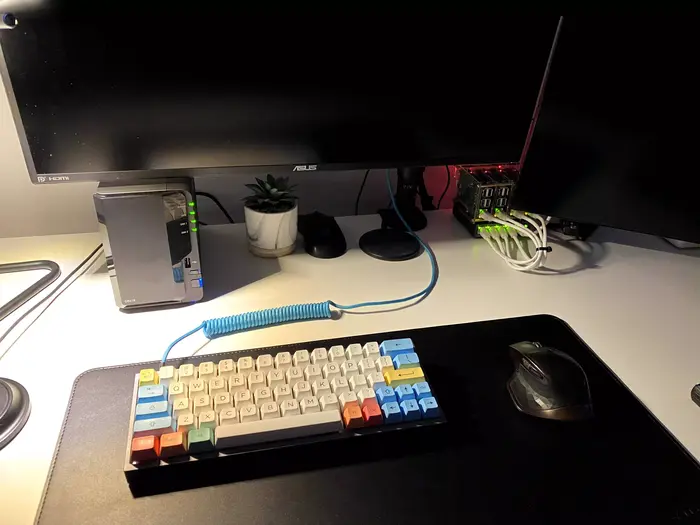
Finally, the NAS and the Pi Cluster on my desk:
Current Specs – May 2021#
As of May 23rd 2021, my Homelab looks very different from when I started it two months ago. After some time, I realized I wanted something bigger than a small 4 Pi Cluster, something that could handle production traffic more efficiently and that would provide more reliability. I opted for the following specs:
- x8 Raspberry Pi 4b
- x3 NVMe 256Gb SSDs
- x5 64GB micro SD cards
- x2 4TB Iron Wolf Pro HDDs
- x1 Synology DS218 NAS
- x1 12U SysRacks PR 12.900
- x1 2U Rack Mount for Raspberry Pi
- x5 Noctua NF-F12 5V PWM
- x2 Noctua NA-FC1 Fan Controllers
- x2 Brush Panels
- x1 Noise dampening mat
- x1 16-Port TP-Link with 8 PoE ports Switch
Now, this is obviously a major upgrade from the first build. Some of main upgrades include: four more Raspberry Pis, a 16-Port Switch, a 12U server rack, and the new SSDs. I bought the NVMe drives to be able to run the Kubernetes cluster in High Availability (HA) mode. Additionally, the micro SD cards were too slow to run etcd, so I had to buy three SSDs for my master nodes, which left five worker nodes (I’ll go more in-depth about this in a future article).
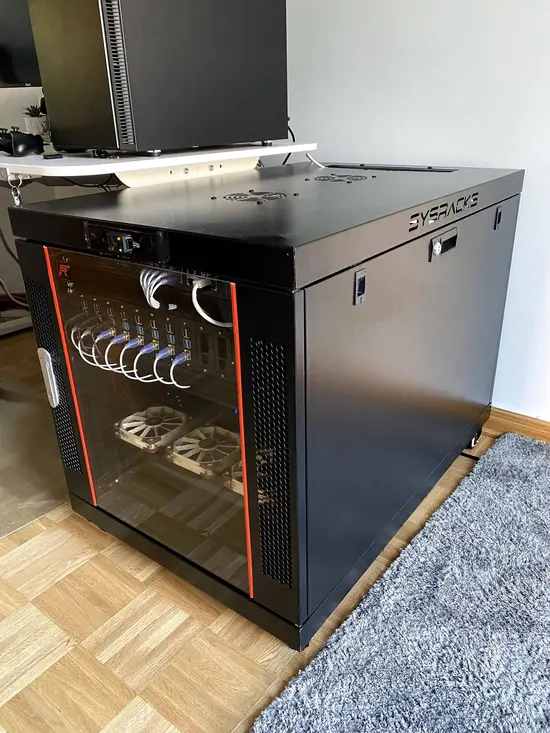
Let’s see what it looks like. Below, you’ll notice that one of the fan controllers sits in front of the rack to be able to control the fan speed on top of it. You’ll also notice the Pi 2U rack mount with the 16-Port switch:
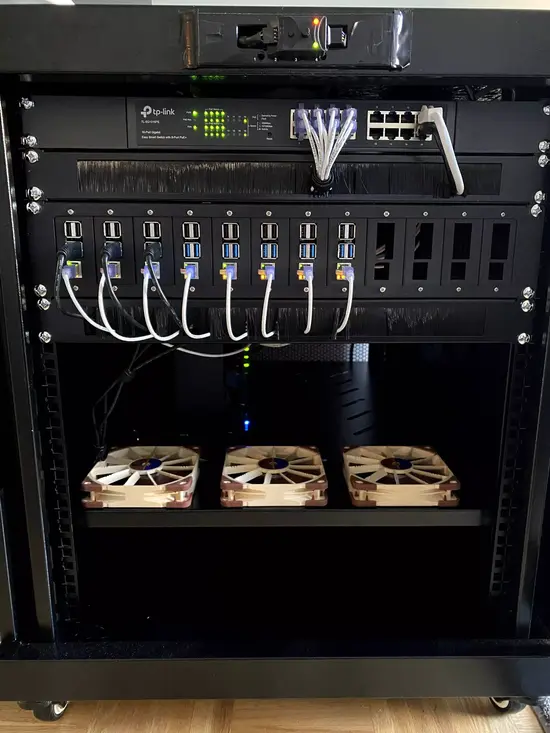
A picture from another angle that shows the entire rack:
Constant Work-In-Progress (WIP)#
A Homelab is a constant work-in-progress. Most people who have a lab at home will tell you the same thing: there’s always something you want to change to make it better. That’s why the current state of my Homelab is definitely not its final one, even if I like it the way it is right now. I’m sure it’ll look a lot different a year from now.
Possible Enhancements#
Speaking of a constant work-in-progress, there are improvements coming. Currently, the three fans that sit in front of the rack aren’t working as well as I thought they would be on their own. So, I bought a new mountable Fan Tray in which I’ll insert the three noctua fans. I’ll place it below the Raspberry Pis to create a better airflow and lower CPU temps on the Pis.
As for the other enhancements… I don’t know yet! Although, I’m sure I’ll have some ideas powered by r/homelab in the near future.
Thanks for reading and talk soon. 👋